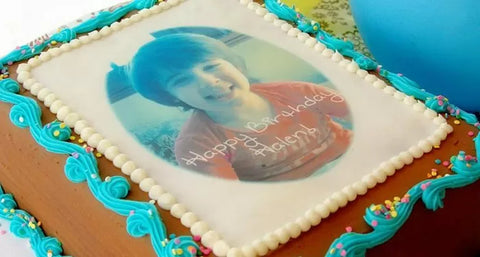
HOW TO APPLY EDIBLE IMAGES TO CAKES
Once you have come into Sugarshack to get your lovely images printed onto the Edible Icing, some find it very hard to place it on their cakes. Here we will give the basic rundown on how to store the icing sheet if not using straight away and how to peel off the backing.
Tip: Keep your edible image in the air tight bag until ready to use. Store at room temperature.
IMPORTANT: Do NOT let water come in to contact with the edible image before or after it is on the cake! The sheet will simply melt and ruin the image.
- Remove your edible image sheet from the air tight bag. For Round Edible Images: using scissors or a sharp razor knife, gently cut 1/8″ around the edible image while on the backing sheet. To customize the shape use sharp scissors, or a ruler to cut the width or length.
Have your frosted cake or treat ready. Your frosting or icing should not be dry or have a skin prior to placing the edible image. Various frostings can be used such as buttercream, store bought frosting, icings, fondant, whipped cream or non-dairy topping, fudge, chocolate and even frozen ice cream cakes. Buttercream and fondant will produce the best results, whipped cream or non-dairy topping can cause image to fade a bit if left in the refrigerator overnight; the consistency of whipped cream is thin therefore the edible inks tend to sink into the cream. - Your frosting should be level for the best results. When applying Edible Images to fondant, brush a small amount of water (no puddles) on the area prior to placing the edible image to ensure it adheres properly; the edible image will not blend into the fondant as with frostings; it is totally touchable.
- Hold both ends of the backing sheet and run the edible image across the sharp edge of a table (image facing up). Pull down on the plastic backing sheet and the edible image should release from the backing sheet. If the image does not release from the plastic backing sheet, place the edible imaged sheet (remove from plastic bag) in the freezer for about 15 seconds (DO NOT GET WATER ON IT). Gently place on flat surface and allow it to rest for 15 seconds, then gently roll the backing sheet over the sharp edge of a table or counter with image facing up (as shown in the photo below). The edible image should release from the plastic backing sheet. Gently remove the edible image beginning with a corner – do not pull hard on the sheet as they are a bit delicate and could rip.
Helpful Tips on Working with Edible Images:
- Once the edible image has been on the cake for about 5 minutes, it will begin to blend with the frosting. Do NOT touch the image, it will leave a visible fingerprint just like frosting does when touched.
- If your frosting has become dry, spray a fine mist spray (no puddles) of water on your frosting before applying the edible image.
- If the edible image creases or rips while placing, gently rub the area back together.
- If the edible image has become dry and brittle, place a damp (not dripping) paper towel folded into a square in the bag (against back side of the PLASTIC BACKING SHEET – not on imaged side) and let it sit for an hour. This will make the sheet moist. Before placing the edible image on your cake, allow sheet to air dry for about 20 minutes.
We hope these step-by-step instructions have shed some light on how to handle your edible icing prints. They are all tried and tested and definitely work, along with the tips right at the end. If you have any further questions do not hesitate to ask our team in store, they will always be happy to help!


